
Solution for the memory problem of pictures for traveling or during the holidays
Who does not know it? One is on photo tour / on vacation and suddenly the memory card is full. You can now take x memory cards or transfer the contents of the memory cards to a laptop. A laptop is big and heavy. I used to buy a photo tank for something like that in the beginning. This had a hard drive 80 GB, a battery and a card reader installed. There you simply put the memory card in the cardreader pressed a button and all the data was transferred to the hard drive, the thing was about the size of 2 packs of cigarettes. But today it looks very different. These photo tanks are hard to come by with large storage capacity. It currently looks quite different with me.
1. The photo tank has long been broken, because the battery broke.
2. What do I want today with 80 GB, that's nothing for today's required data volume
So I dragged for many years then some memory cards with me whose data I then dubbed in the accommodation on the laptop. When they were full on the way, I was unlucky and could not take pictures anymore.
Today in the age of smartphones and tablets, there is a very elegant solution to the problem.
All required parts are very light and small.
- First you need a smartphone or a tablet (I take my Samsung Galaxy S10)
All other required parts you can buy at Amazon.
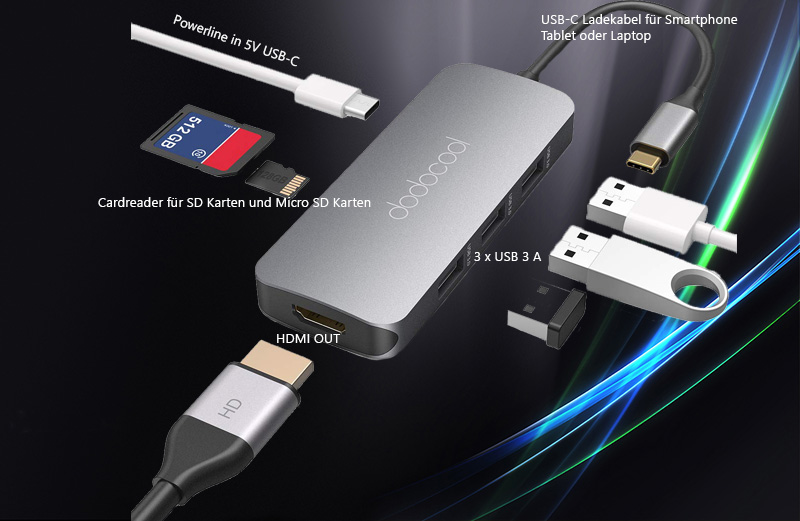
- then you need a USB hub. I use here the:
Dodocool USB C Hub, 7 in 1 USB C Adapter with HDMI, SD / Micro SD Card Reader, USB-C Charging Port, 3 USB 3.0 Ports for MacBook Pro / Air, Chromebook, Samsung S8 / S9 / S10, Huawei Mate 10/20 / P20 etc.
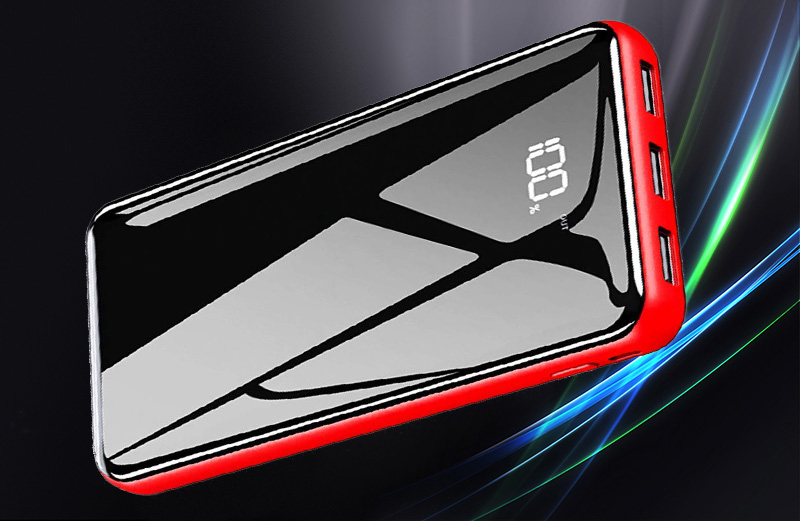
- further you need a Powerbank for power (I use a Gnceei Powerbank 25000mAh with which you can also charge the smartphone wirelessly)
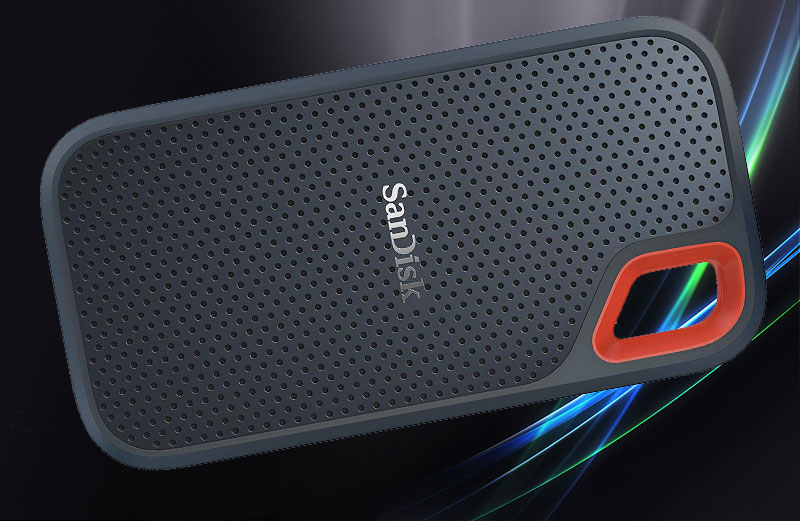
- Furthermore, a storage medium I have here for the SanDisk Extreme Portable SSD external hard drive decided because it is very small 95 x 45 x 7 mm, because it is not a mechanical thing that can break and because it requires less power than a mechanical hard drive. They are available in different sizes up to 2 TB. Of course, this also works with larger mechanical hard drives. They need more power and then it is likely that you still need a USB power Y cable.
you should now use other memory cards as SD or Micro SD cards you need a card reader. If he does not work it's because he does not get enough power. In that case you will need a USB power Y cable connected to the hub and power bank. Then the power bank supplies the necessary power.
To copy or move the data you still need a good file manager for your phone / tab. For example, the Windows Commander for Handy / Tab or the ES Manager.
- Hits: 3549
Photo showcase
First I had a normal closet where I had housed my photo equipment. But memories are attached to all my parts. So I decided to change the storage location. I've been looking for glass showcase for a long time on the internet, but those square pillars were not what I had imagined. In addition, there would have been no room for the most important things. Since I did not want to present this in public, but only for myself, I chose my office as the location. Strangers and relatives rarely come in there.
I searched the Internet over and over again for months for those showcases, but that was not what I had imagined. Then all of a sudden I found a used pharmacist showcase at EBay. That was what I had in mind. To my chagrin, she was white and not oak like my office but that did not matter at the moment. So I bought this showcase and picked it up.
I simply placed them on my oak sideboard. That that does not fit the wood and a break in style, I did not care. Ok the place was found now.
Then came the next problem. How do I keep the dust out of there? Again I looked around the net and sealed the whole showcase with rubber seals at the edges to the wood. The only thing left was the surface over which the panes of the showcase roll against each other. But here too, I quickly found something in the form of a plush seal. I simply glued this seal to the edge of the innermost pane.
Done was my showcase for the photo equipment. That looked great, but it was not that right.
My office is out to the garden, there is a really big window of 3.5m x 1.3m in it and goes out to the south-west, but still it is quite dark due to the plastic Lightplates of the terraceroof. Especially in winter. By the way, for a patio roofing, I would not take these milky plastic Lightplates anymore, because I would definitely prefer glass, not because of my showcase, but plastic Lightplates make the room really dark.
So there had to be lighting. Then there were LED strips on. I chose cold white LED strips and put them in the showcase.
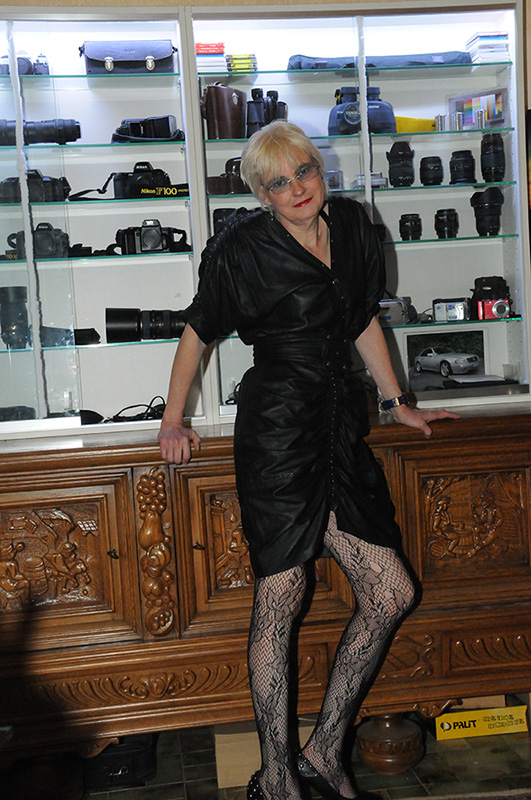
Part of the result you can see here with my wife before. That was a quick shot, I do not have another picture at this moment.
In the last days I had the idea to change the back wall of the showcase. I thought mirror foil would not be bad. If that does not look good then make right mirrors on the back of the wall. Let's have a look ...
- Hits: 2814
Photo Accessories
On this page I would like to write something about photo accessories, in order not to get around if you are ambitious and without various photos are not possible.
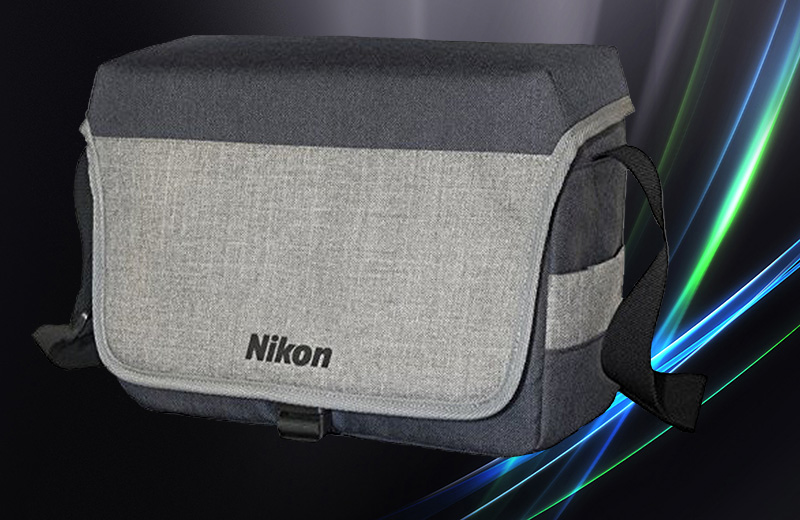
Photobag small
If you go on tour with manageable photo equipment is usually enough a small photo bag. These small bags cost about 20 euros and protect the photographic equipment during transport and you can still accommodate a variety of little things. Such a small photo bag rich e.g. for a few small accessories such as one or the other filter, the body with lens and e.g. a flash or another interchangeable lens. In many situations they are sufficient.
Here is an example of such a bag. (I chose this one because I bought one just for my wife, I'am using a similar other little bag)
Nikon VAE29001 CF-EU11 SLR Systembag
Photobag big
In situations such as It can happen fast to a more intense photo shoot, that such a small bag is no longer sufficient because you want to take a second body, flashes, a tripod and various lenses. Since such situations came before me more often, I then added an XL photo bag. My choice this one.
Mantona New York Photobag
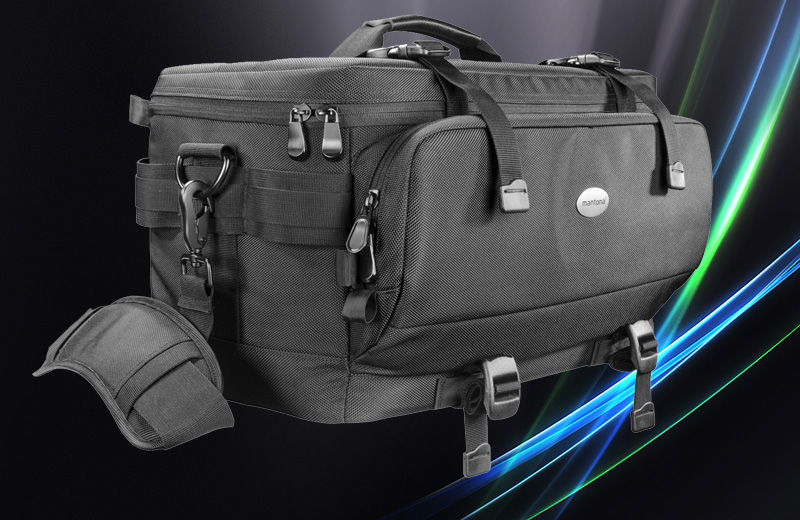
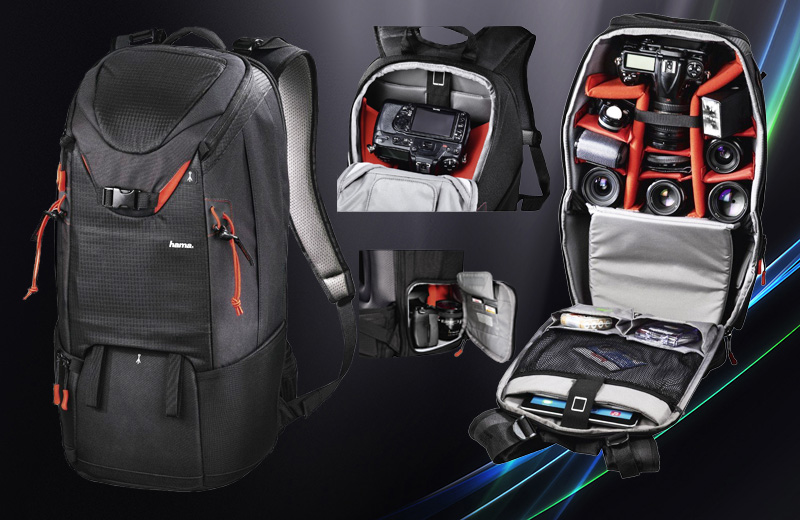
Some time ago, I then like many friends of photography I deal with wildlife photography here you need then partially interchangeable lenses, - if necessary, a second body and an external flash. Then there was something to drink and a little something to eat because I did not want to pay the prices in the zoo. As my wife often accompanied me on these tours, the food and drinks had to be taken twice. In such a situation, a large heavy bag (the bag is not heavy but the contents) was not very appropriate. After a short time the shoulders hurt from the weight and so a day in the zoo or on a city tour is not very pleasant. Remedy shank here a photo backpack. So then also so a part was acquired.
As we often went to the zoo with two people and we had annual passes, the backpack i purchased was big.
Hama camera backpack for 2 DSLR cameras and equipment (photo backpack, 21 L, quick access, tablet compartment, rain cover, and tripod mount)
Tripods & Accessories
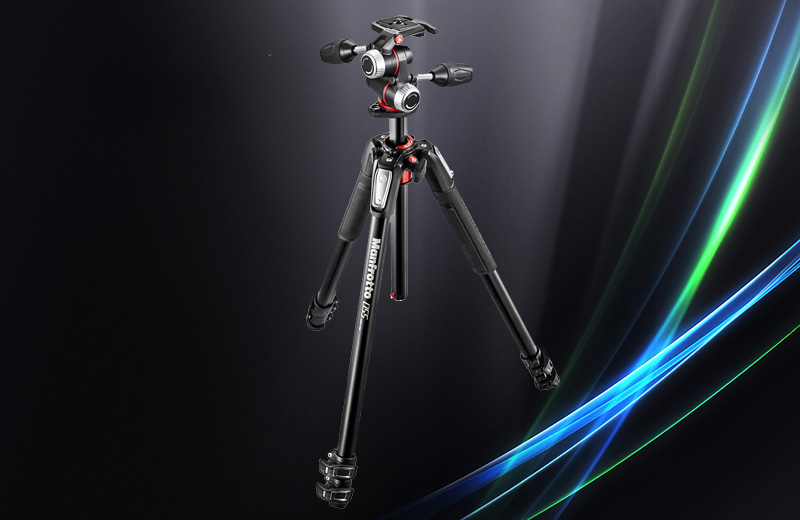
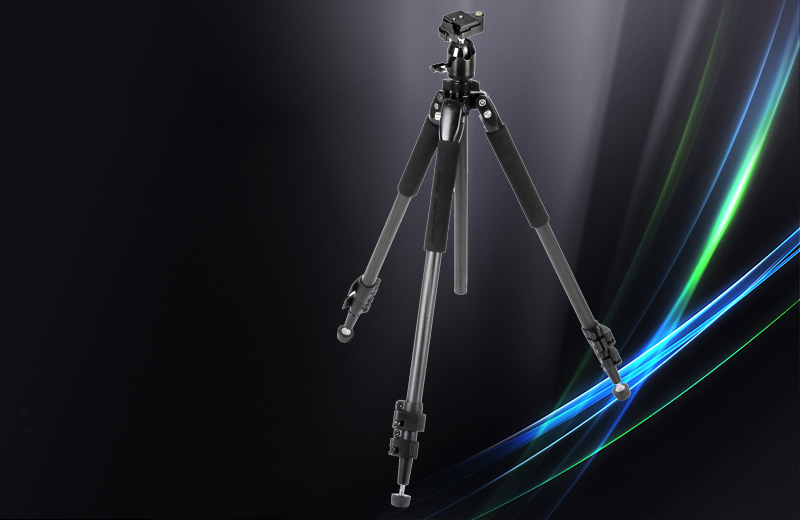
In low light or for night shots you need a tripod. The first tripod I bought was a pretty "heavy" aluminum tripod. Here a lot of my choice on a Manfrotto with 3D Neiger similar to this one. Such a 3D tilt is great if you want to stay in one plane, for example for panoramic photos. So a tripod with 3D Neiger is about 300 euros, which is already for a tripod a proud sum.
Manfrotto 055
For quick shots, or because of the situation I just took the attitude too long, so I replace the 3D tripod head against an action grip.
Mantona Basic ActionShot Tripod Head

The handle has a weight of 825g with the Manfrotto headless about 2500g made a total weight of 3325g. That does not sound like much, but when you carry it with you for hours, every gram counts. So I looked for a lighter tripod, so I bought the Walimex pro WT-890T carbon + ball head FT-002H. I dismantled the ball head and swapped it for the action grip. Since the Walimex incl. The ball head FT-002H only weighs 290g without ball head estimated 220g results with my Actiongrip a weight of about 1100g. That's a huge difference to the Manfrotto with action grip of almost 3500g.
But the big advantage of weight can also be detrimental. It is pretty top-heavy in normal weather is quite stable, but when stronger wind is added, this is not particularly stabble. So I'm glad to have kept the Manfrotto and so I can pack the tripod that seems appropriate. Qualitatively you can not compare the two tripods, as the Walimex is far inferior but it does its service well.
Walimex pro WT-890T Carbon + Ball Head FT-002H
Battery Grip
Such a battery grip is a great help among others in high-profile photos. He has an additional trigger, that one does not have to bend the hand so and in addition the adjusting wheels which are also seen on the top right of the camera. This greatly simplifies these high-profile photos. But even if you work with long focal lengths, it helps to keep the camera stable.
In these handles 2 rechargeable batteries purely what the operating time doubles. As an additional Gimmik there is then still the battery compartment, use for alkaline batteries or batteries of size AA (Mignon). Then you do not need the original batteries.
A negative point would be there, the camera is heavier. Often is also counted as a negative point that the camera gets bigger, but that's not really negative in my eyes because you have more in your hand and is thus able to keep the camera stable. This is not so important with small lenses, but with large and heavy lenses with high focal length and high light intensity, such a grip makes a noticeably positive impression.
Here I have a picture that shows a Nikon D200 with the corresponding battery grip Nikon MB-D200 underneath, right above the battery grip is alone to see. The picture below on the right shows the battery grip Nikon MB-D10 of a D300 / D300s. With it you can operate 3 batteries on the camera. One battery in the camera and two in the battery compartment, alternatively again the possibility to use a rechargeable battery with Mignon AA batteries.
| Nikon D200 & Nikon MB-D200 | Battery Grip Nikon MB-D200 |
|
Battery Grip Nikon MB-D10 |

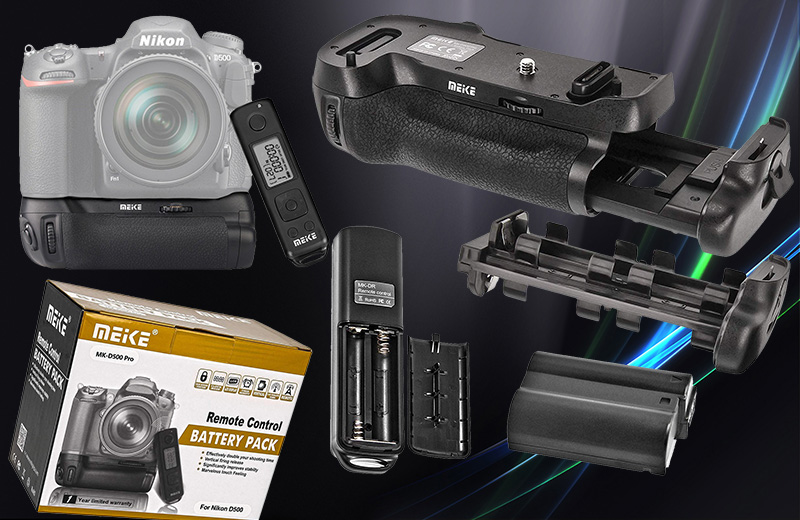
You do not necessarily have to buy an original battery grip from Nikon, there are good manufacturers that offer something much cheaper.
Here is a tip for a fairly good battery grip of Meike for the Nikon D500, the price here is about 80 euros, compared to the Nikon MB-D17 costs about 385 euros. The Nikon battery grip has only the usual normal functions, the Meike battery grip has a radio remote control with it. This remote control offers the following functions in addition: The remote release takes place with 2.4 GHz radio frequency and has a range of up to 100 meters. Setting and controlling the timer such as shutter delay, long exposure, interval shooting.
My conclusion: The processing of the battery grip is not bad, the Priceing and the additional features have made my choice in favor of the Meike battery grip. Such a remote trigger is very practical z.b. at night. By pressing the shutter button, long-term exposures can cause wobbly jolts, which you can not use expeditiously with long focal lengths. This faults can now be fixed with self-timer or just with such a radio remote control.
Meike Battery Grip for Nikon D500
- Hits: 3521
XP-Pen Artist 22 E Pro HD Graphic Tablet
For a long time I had the desire for a graphic tablet. However, I also had certain claims. It should not be too small you in any case with monitor.
Some years ago I met a representative from Wacom. Through his friendship which of course was very short, sales call in a computer shop just where I just made representation for the owner, I was the company in terms of graphics tablets even on the radar. So I looked at Wacom some time ago. But the prices that were called, about 1500 € for a Wacom Cintic 22 inches, I was just too high for my use. At the other Fiji Fong parts where my company name did not say anything I did not trust. So I lost sight of it all until a few days ago.
Last days I had done some things that was hell with the mouse, again the thought came to me Grafic Tablet. Well, now the Wacom Cintic 22 inches cost around 1600 €. I really did not want to spend that much money, at least not for what I'm doing with it. Theme done again. ...
Well not quite - I started sniffing Google for graphic tablets. By chance, I came across XP-Pen. Then I looked at Amazon what the parts cost and have read reviews to me. Then again in the net for the selected XP-Pen Artist 22 E Pro HD searches. Since the reviews were quite good, I decided to play such a part. With 599 euros it seemed like a bargain compared to the Wacom price for a comparable graphics tablet.
2 days later it also arrived. As I had already read in the tips, the included cables (USB printer cable and HDMI cable) were too short. In wise foresight I had ordered the same in 3m again. Fortunately, the cables came on the same day as the tablet with DHL. You know how that is ...
Does the child have a rag and can not ... That would have been fatal. But that was not so. Thanks to the people with the cable tip !!!
So I could build everything and then install the whole thing. Everything was easy and is also described quite well in a German manual.
Here is a picture of the tablet.
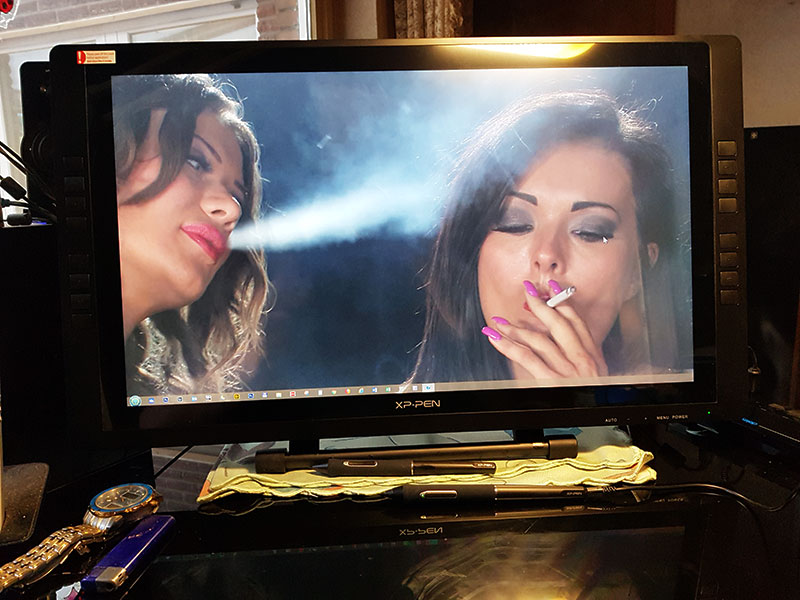
The packaging and accessories inc. Graphic Tablet includes: The graphic tablet, 2 graphic pens, 8 spare nibs, box for a pen with spare seats, VGA cable, HDMI cable, USB printer cable, pen USB charging cable, USB adapter , a 2 finger glove, cold connection cable 220V, transformer with power cable and the software (driver incl. description)
The tablet is Multilingual you can put it in English, the software is also in English.
As I said, if the PC is next to the desk, the VGA cable, the HDMI cable and the USB cable are too short.
I have ordered the USB cable and the HDMI cable in 3m and glued them together with insulating tape, so every 30-40 cm 3x wrapped.
The graphic tablet should run with the usual software offers. From Adobe Photoshop CS6 and the really old Photo Impact 12 I can confirm that.
If I have gained experience with the time, I will report this here.
So now practice practice.
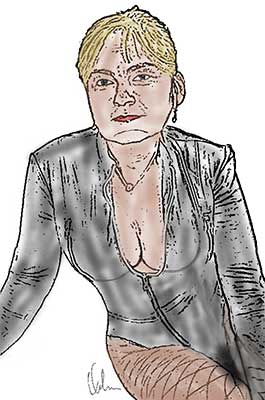
It has now passed a little time, I have the first attempts to draw freely hand behind me. Here are my first 2 pretty simple designs.
| A simple line drawing | A simple line drawing, then brushed. | |
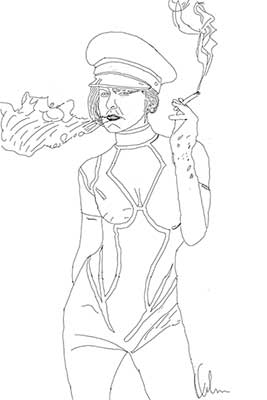 |
 |
First conclusion:
The Tabet leaves a good impression, to criticize is a tiny paralax error, but you got used to it quickly. If you do not use it as a graphic tablet you can use it as a second monitor with HD resolution. This means you can open two or more applications and push the window of the application you want to see separately on the tablet. Fast drag-and-drop paste data from one application to another, saving you the hassle of window-clicking. But also great for comparing data, or just let a movie run.
- Hits: 3242

")