
How important is the lens correction in photo editing?
Here I have made 2 pictures I have darkened a bit so you can see better of what I write here. To preserve the identity of the lady, I have made the face unrecognizable. But that does not bother here. Test objective here was the Tamron 18-270 F3.5-6.3 DI II VC PZD.
Picture 1 without lens correction
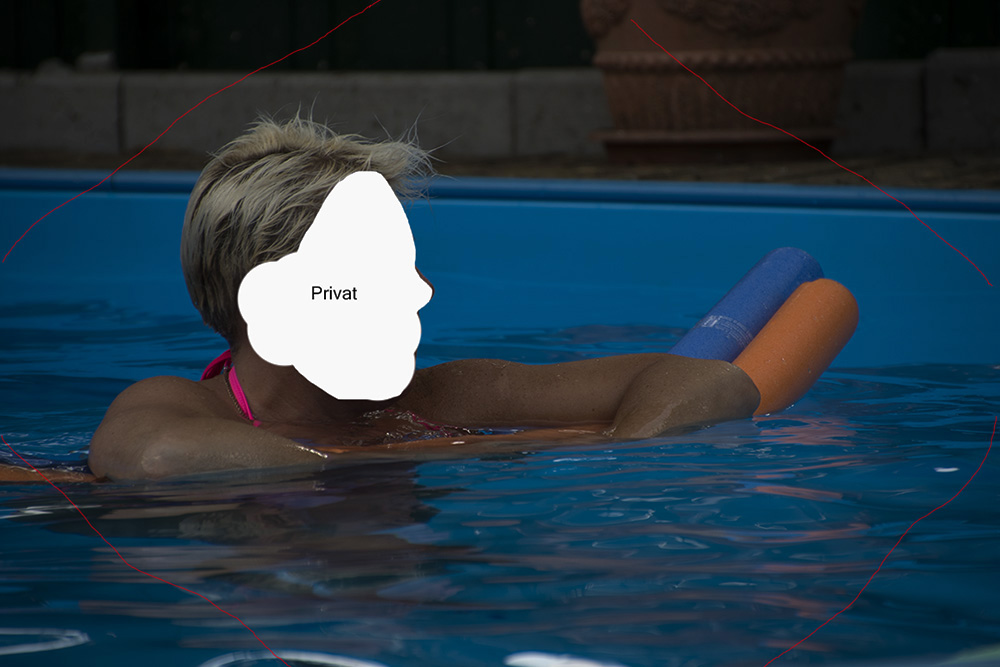
Here is clearly seen from the center of the image as the light intensity of the lens approximately from the red lines and before falling to the outside. The red lines do not have the claim to be exactly right they should only clarify in which area this begins approximately for better perception. I hope you can recognize that. Nice to see that also at the rear blue pool edge.
Picture 2 with lens correction
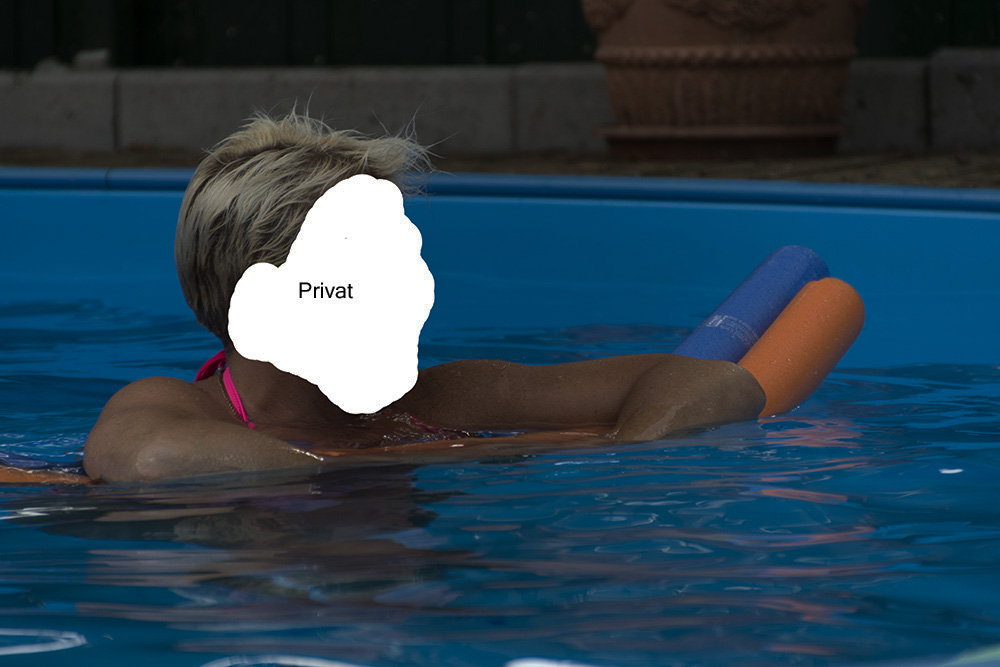
Here the effect has disappeared, the picture now has a uniform brightness up to the edges. These bugs can be fixed with Camera Raw. In the program are from x manufacturers and x lens correction data implemented. If the data is not available, you can do it yourself.
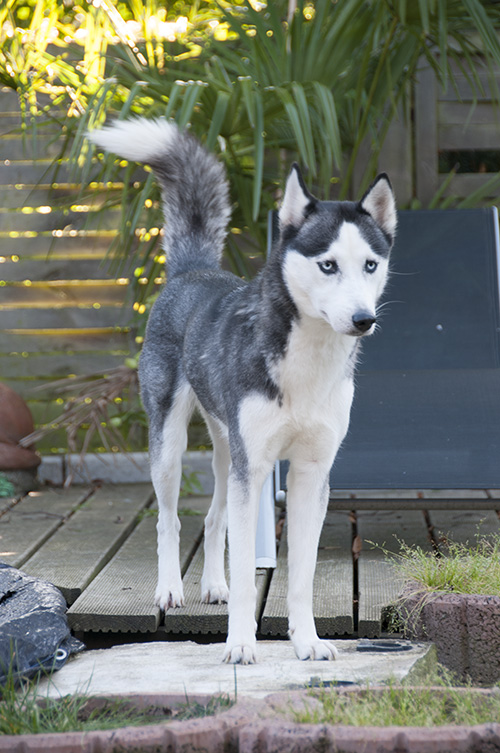
Here are two more pictures next to each other
The test lens here was the Nikon Nikkor AF-S DX VR 18-200mm F / 3.5-5.6G IF-ED
| without correction | with correction |
 |
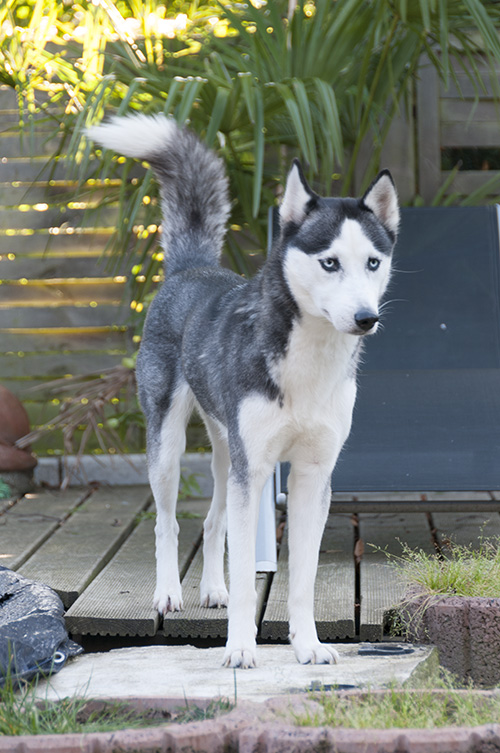 |
Another lens the same effect just not as violent as the Tamron.
I hope the tip has brought you a bit further on the way to even better pictures.
- Hits: 3394
Why photo editing
At this point I would like to show you how important image editing is to make good photos even better. That's an older picture it was made with a Nikon D300 in conjunction with a Nikon Nikkor AF-S VR 70-200mm F / 2.8G IF ED. The picture was taken out of hand and without flash.
Good cameras can also save the images as RAW data files or in RAW and JPG at the same time. The RAW data file is much larger than the JPG data file and contains much more image information. Now we make good pictures even better. We just have to make this image information visible. These normally invisible image information is called micopixel. How far you can visualize this depends on the quality of the camera and the lens.
I use Photoshop CS6 and Adobe Bridge. Adobe Bridge is a part of Photoshop. The better I prepare the image in the Bridge or Camera Raw (Camera RAW belongs to the bridge) the less I have to do with Photoshop and the better the picture gets.
I do not want to show at this point how that works, that would totally blow up the frame. From Video2brain there is a "Power Workshop Contrast and Sharpness in Photoshop" by Addison-Wesley Publishing, which explains you very well how to do that. I can write a lot here and you think the guy has a titmice because of micropixels, etc .. Here I take the proof.
Attention, if necessary, a little longer loading time 2 large image files are loaded.
First, a picture as it was interpreted without editing RAW data through Adobe Bridge. Basically a pretty great picture.
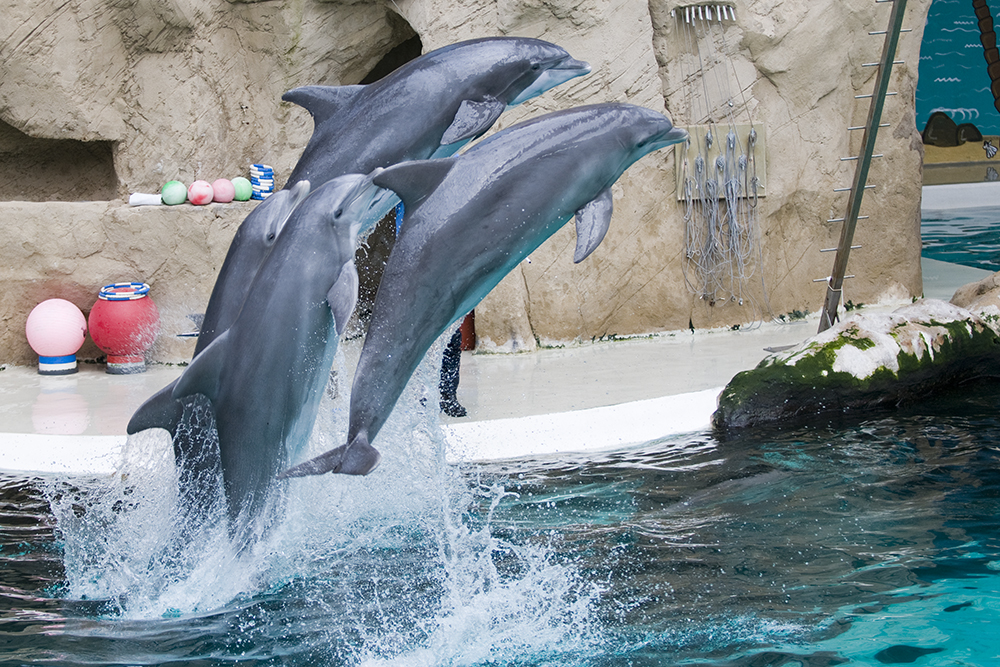
Now the same picture edited. If you look at the background of the rock structure has now much more structure, details and contrast richer (the contrast control was not operated here). And look at the dolphins, the drainage of the water from their skin is much easier to see here.

These photographic works are only about the RAW data. With JPG files, this is not possible because they do not contain the necessary image information.
In the new Photoshop CC2020 something has changed to the CS6, here you don't have to activate the camera pixel first and then the Micropixcel in Photoshop. Small details can be activated here directly. I got my old picture out of the dolphinarium again. The first picture is an out of cam picture only reduced here as a screenshot in Cameraraw 12.1

and here you see the same thing again with the difference that I pushed up the structure regulator. Otherwise no changes were made to the image.
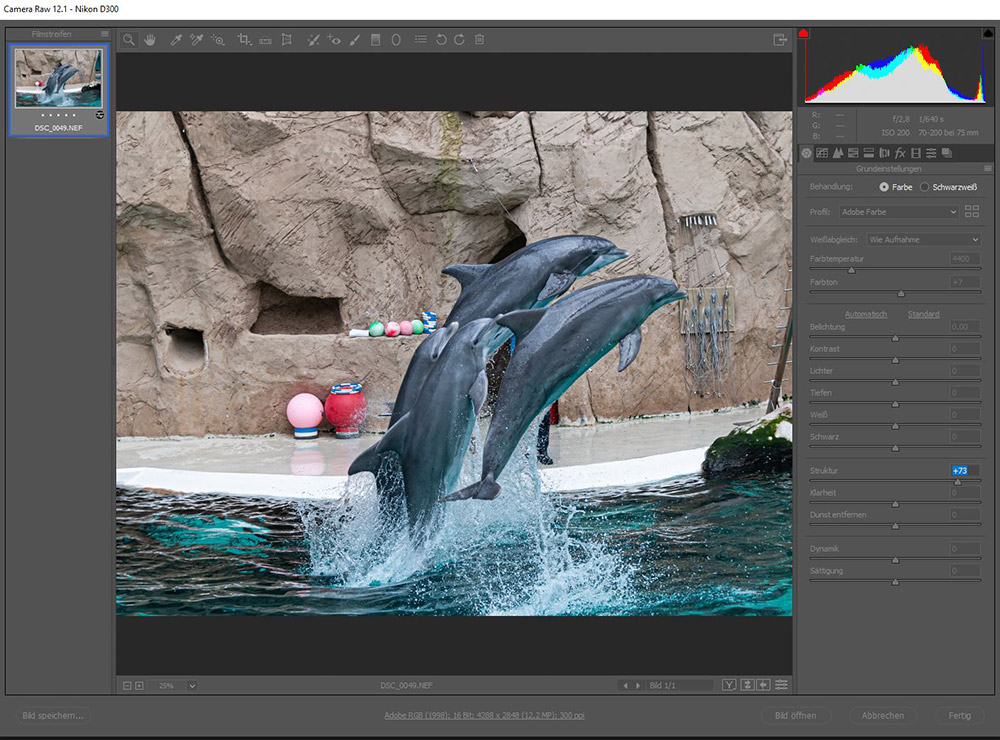
As you can see, the structure of the rocks has increased significantly.
I hope you have made something curious about photo editing and wish you a lot of fun while you try to familiarize yourself with the topic.
So you do not feel the same sad since here's a tip to Adobe Photoshop CS6!
Problem: Adobe Photoshop CS6 does not read the RAW data of your camera.
That happened to me with the RAW data of the Nikon D500. The D200, D300 or D300s were still working.
I use Adobe Photoshop CS6 to edit the images. However, CS6 is already getting a bit old. With the purchase of the Nikon D500 I was suddenly unable to read the new .NEF (ie RAW data) of the Nikon D500. If you have the same problem with your camera (this is manufacturer independent), the first step would be to dare camera raw up. The last executable version of Camera Raw for Adobe Photoshop CS 6 is Camera RAW 9.1.1. There are newer versions but they do not work with Adobe Photoshop CS6. If you still can not read your RAW files then you have to download the DNG Converter from Adobe and convert your camera specific RAW files to DNG format. The mentioned software is available free of charge from Adobe.
What the DNG format exactly is would go beyond the scope here. But if you have converted, you will not lose data to your old RAW data. With the DNG files you can continue working as usual.
- Hits: 3105
What can an image stabilizer
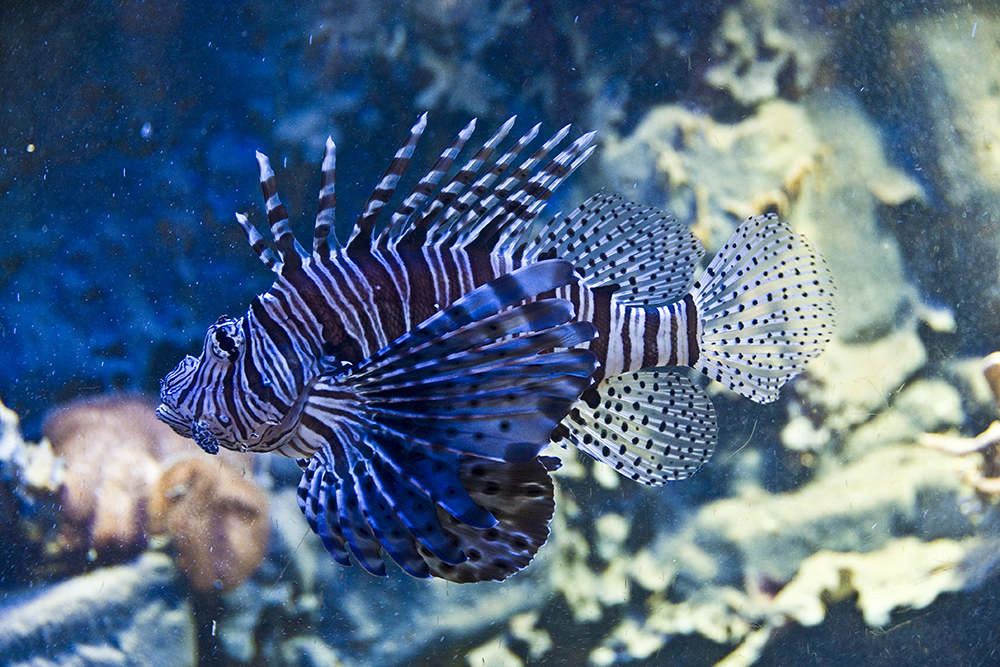
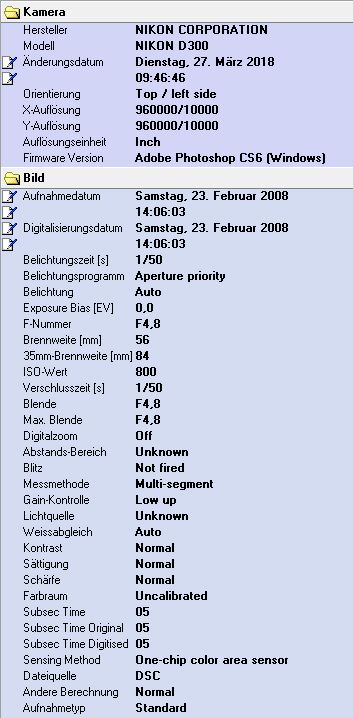
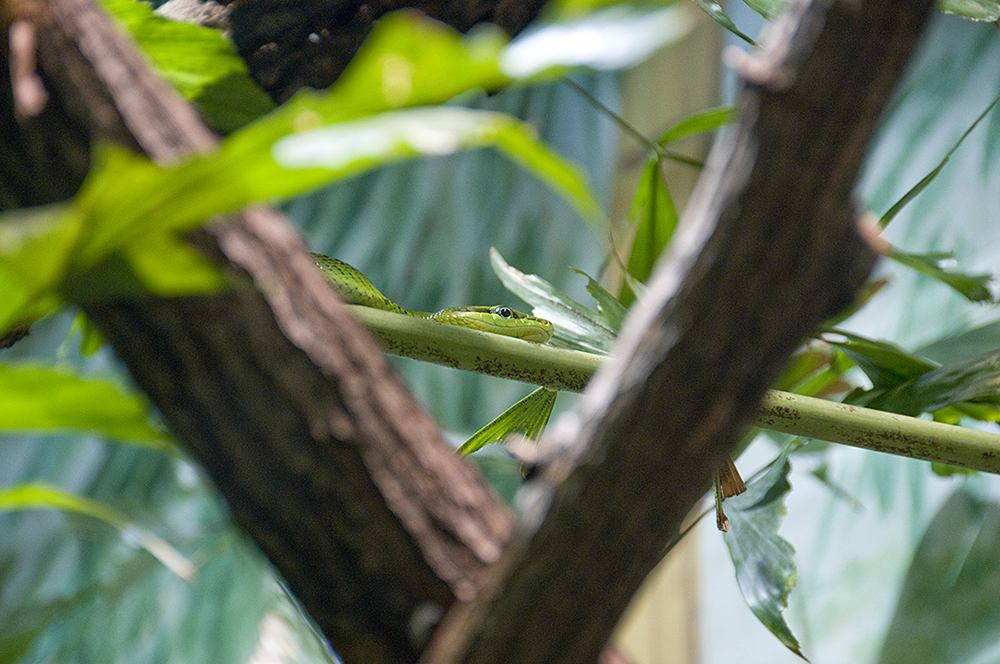
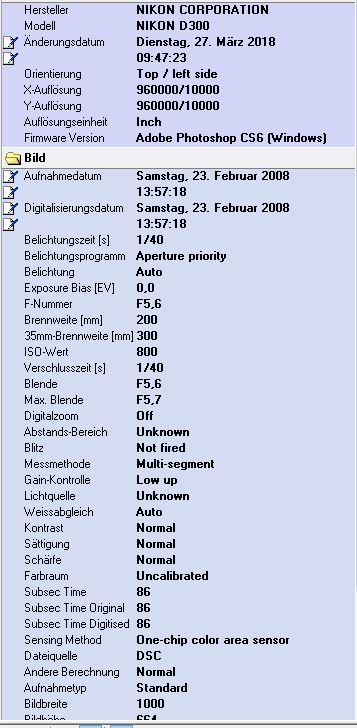
At Nikon, the image stabilizer VR, at Sigma OS, and at Tamron VC. Here I would like to show just what an image stabilizer can do. For this I have picked out two photos that were created during a visit to the zoo. The Exif specifications are attached and show the camera settings. Both photos were taken with a Nikon AF-S 18-200 mm 3.5-5.6 DX G IF ED VR. This is a normal hyper zoom lens from Nikon with image stabilizer (VR).
 |
 |
 |
 |
 |
 |
|
Both photos are as you can see from the Exifdata without flash with a lens with normal normal Lichstärke been made. Both motifs were behind glass. The photos were taken with open aperture and aperture priority. Both photos are not blurred. About the thumb you say with a steady hand you can Freehand 50mm focal length from 1/60 second get free of decay. The larger the focal length, the harder it will be to blur the picture. The top picture is like you can read with 1/50 second and a focal length of 56mm. With luck you can do that without blurring. The lower picture is made with 1/40 second and with 200mm focal length. Without image stabilizer freehand the image at the exposure time of 1/40 second and the focal length of 200mm would certainly not be sharp. Normally I always prefer lenses with image stabilizer with the same focal length and light intensity. Unfortunately, these lenses, especially when they are really strong, always have a very high price. Here you just have to decide if you are ready to pay the price for a hobby. However, it does not always have to be an original Nikon lens, there are cheaper alternatives from Sigma or Tamron. Unfortunately, these are often a little weaker. |
||
- Hits: 3056
Background for exemptions
A really interesting area in photography is the photographing of people. Many photos with a great background are created in the photo studio. Whether it is a fantasy background or a natural background does not matter.
To release the desired person you first have to take a good picture of them. This works very well in front of a dark gray or anthracite colored background. The gray must not be too bright and not too dark. But you see the color here in the picture.
The background is just paper / cardboard which you can buy on wheels. These rolls are about 2,70m wide and 11m long. The paper becomes dirty and creased over time, then you cut off the piece and take something new from the roll. For hanging you can now use a background system or hang it with ropes on the ceiling.
I have used 3 studio flashes when creating this image but it is synonymous with a system flash for the beginning.
So now you have taken your picture I take this as an example.
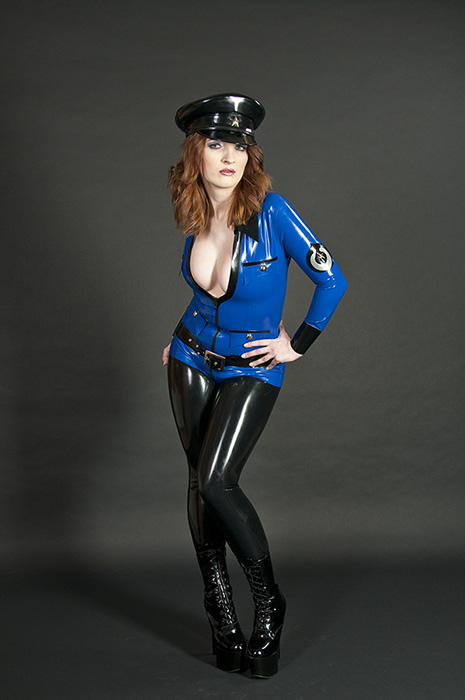
As you can see, all the colors contrast well with the model. Of course this simplifies the exemption work.
I do not want to talk about how to make exemptions in Photoshop. But those who want to learn how to work with Photoshop can attend a course at the VHS. Another good alternative is the Video2Brain courses available on DVD. If you do not want to spend so much, look for Ebay. Often, these DVD courses are offered there cheaply.
Here are three examples where I did something like that.
example 1
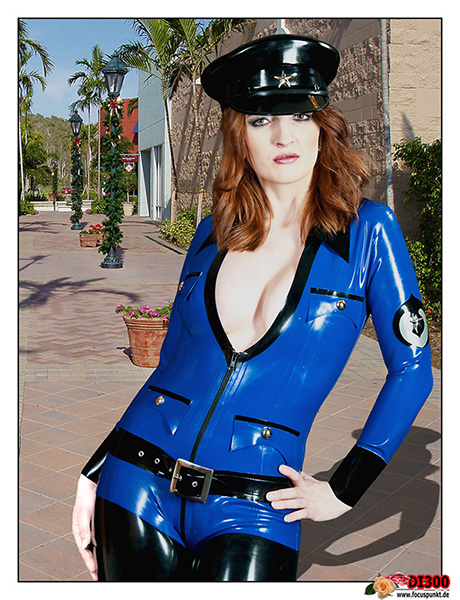
The background photo is in a shopping time between Ft. Myers and Naples (Florida / USA) originated. The model was photographed against a gray background.
Example 2
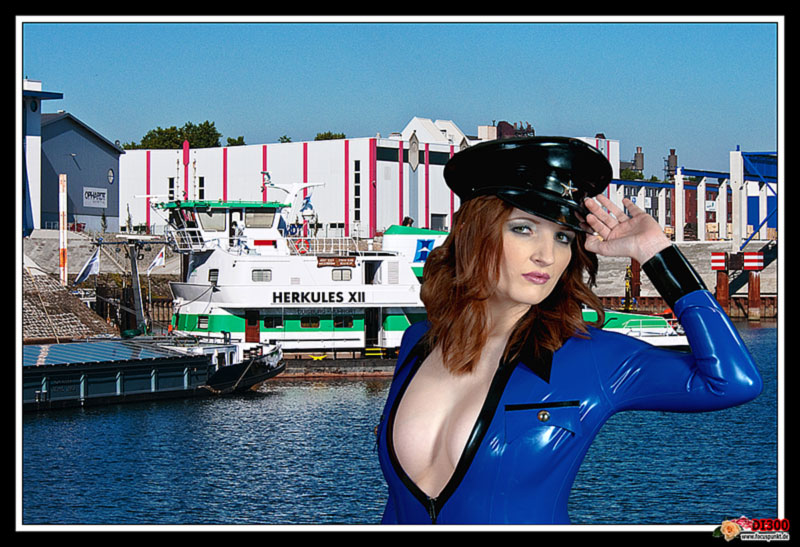
The background photo was taken during a harbor cruise in the Duisburg inland harbor. The model photo again in front of gray background.
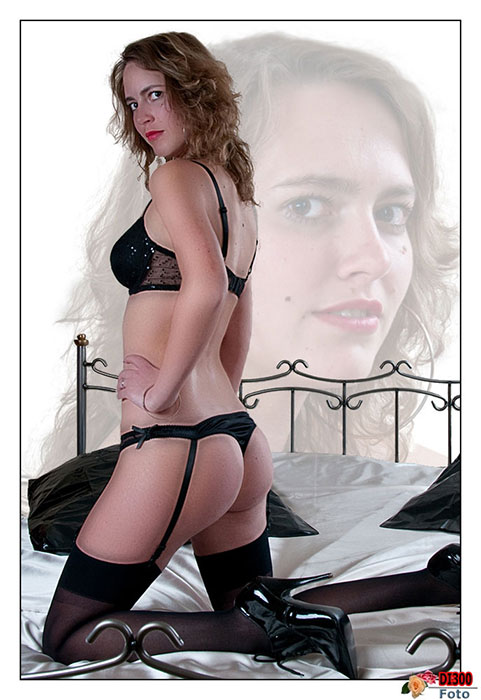
Example 3
Again, the picture consists of 2 pictures. The first picture was the model on a metal bed. The model with the bed was released and the second picture, her own portrais, was released. This was then inserted as background.
- Hits: 3113

")